The python implementation, mathematical background, and noise removal using Fourier Transform are explored in this VIDEO..
Showing posts with label Animation. Show all posts
Showing posts with label Animation. Show all posts
Sunday, May 16, 2021
Monday, May 10, 2021
Basics of Fourier Transform
Thursday, July 16, 2015
Friday, February 08, 2013
3D View of PN Junction
 | |||
| P Type and N Type Materials- Before forming the Junction |
 |
| P and N type Materials Brought together |
 |
| Recombination Started (Gold Balls- Recombination) |
 |
| Depletion Region Formed |
(From the article: 'Education in Three Dimensions: Using Virtual Reality in Education for Illustrating Spatial Relationships' by ALLPORT, Christopher, SINES, Paul, SCHREINER, Brandon & DAS, Biswajit)
Sunday, August 12, 2012
BUTTON BATTERIES

The below link shows the animation of button batteries
Animations of Button Batteries
Friday, August 10, 2012
"From Atom To Electricity" a microscopic view

Here is a microscopic view of electricity. How electrons flow inside the conductors.
Please click the Below Link to view the Animation.
I hope it will give you a better understanding on it.
Animation of Electricity
Perceptron- Artificail Neural Networks
 |
| Neural Networks |
Artificial neural networks are composed of interconnecting artificial neurons (programming constructs that mimic the properties of biological neurons).
Artificial neural networks may either be used to gain an understanding of biological neural networks, or for solving artificial intelligence problems without necessarily creating a model of a real biological system.
The real, biological nervous system is highly complex: artificial neural network algorithms attempt to abstract this complexity and focus on what may hypothetically matter most from an information processing point of view.
Here is a fantastic animation on Perceptrons in the Neural Networks
Animation of Perceptron
Wednesday, August 08, 2012
An Introduction to Micro Processors
Here is a fantastic animation for the fundamentals of Micro processor.

What are the main components of the Micro Processor?
How a Micro Processor works?
Please click on ANIMATION 1 to view the introduction on Micro Processor.
Please click on ANIMATION 2 to view the detailed animation on working of the Micro Processor
What are the main components of the Micro Processor?
How a Micro Processor works?
Please click on ANIMATION 1 to view the introduction on Micro Processor.
Please click on ANIMATION 2 to view the detailed animation on working of the Micro Processor
Breakthroughs in ICs over a decade
We know that the advancement in the IC technology changed the world and it is the main reason for the portable devices available now-a-days.
In the below animations, you can see what happened in the past years after the first IC has been manufactured.
Animation 1
Animation 2
 |
| First Integrated Chip |
In the below animations, you can see what happened in the past years after the first IC has been manufactured.
Animation 1
Animation 2
All about FLIP FLOPS - Animation
I have gone through a fantastic Flash Animation of Flip Flops.
I got a clear idea about the difference between LATCH and FLIP FLOP through this animation.
You can learn all the basics of Flip Flops here.
Please CLICK HERE to view the animations
 |
| Difference between LATCH and FLIP FLOP |
I got a clear idea about the difference between LATCH and FLIP FLOP through this animation.
You can learn all the basics of Flip Flops here.
Please CLICK HERE to view the animations
Instruction Fetch in a Microprocessor
 |
| Instruction Fetch |
The above graphic animation illustrates typical operation of an instruction by the processor.
It places the contents of the instruction pointer onto the address bus and fetches the instruction.
Once decoded, the instruction is executed and the instruction pointer altered to point to the next instruction.
Saturday, August 04, 2012
SOLAR CELL
A solar cell is also called as photovoltaic cell is an electrical device that converts the energy of light directly into electricity by the photovoltaic effect. It is a form of photoelectric cell when exposed to light, can generate and support an electric current without being attached to any external voltage source.
Photovoltaics is the field of technology and research related to the practical application of photovoltaic cells in producing electricity from light, it is often used specifically to the generation of electricity from sunlight.
The solar cell works in three steps:
The efficiency of a solar cell may be broken down into reflectance efficiency, thermodynamic efficiency, charge carrier separation efficiency and conductive efficiency. The overall efficiency is the product of each of these individual efficiencies.

This diagram shows a typical crystalline silicon solar cell. The electrical current generated in the semiconductor is extracted by contacts to the front and rear of the cell.
The top contact structure which must allow light to pass through is made in the form of widely-spaced thin metal strips it is also called as fingers that supply current to a larger bus bar.
The cell is covered with a thin layer of dielectric material - the anti-reflection coating, ARC - to minimise light reflection from the top surface.
 |
| Basic structure of silicon based solar cell |
Photovoltaics is the field of technology and research related to the practical application of photovoltaic cells in producing electricity from light, it is often used specifically to the generation of electricity from sunlight.
The operation of a photovoltaic(PV) cell requires 3 basic attributes:
(1) The absorption of light, generating either electron-hole pairs or excitons
(2) The separation of various types of charge carriers
(3) The separate extraction of those carriers to an external circuit.
The solar cell works in three steps:
- Photons in sunlight hit the solar panel and are absorbed by semiconducting materials, such as silicon.
- Electrons (negatively charged) are knocked loose from their atoms, causing an electric potential difference. Current starts flowing through the material to cancel the potential and this electricity is captured.
- Due to the special composition of solar cells, the electrons are only allowed to move in a single direction.
The efficiency of a solar cell may be broken down into reflectance efficiency, thermodynamic efficiency, charge carrier separation efficiency and conductive efficiency. The overall efficiency is the product of each of these individual efficiencies.
Silicon based solar cell
This diagram shows a typical crystalline silicon solar cell. The electrical current generated in the semiconductor is extracted by contacts to the front and rear of the cell.
The top contact structure which must allow light to pass through is made in the form of widely-spaced thin metal strips it is also called as fingers that supply current to a larger bus bar.
The cell is covered with a thin layer of dielectric material - the anti-reflection coating, ARC - to minimise light reflection from the top surface.
Thursday, August 02, 2012
Sinusoidal Oscillator
Block Diagram of Oscillator
Before explaining the block diagram of an oscillator, let us recall the concept of positive feedback amplifier. All of you know that positive feedback amplifier consists of amplifier having gain of ‘A’ and feedback circuit with gain of ‘β’. Here, a part of output is fed back to input through feedback circuit. The signal which is fed back is added to the input signal using summer ‘Σ ’ and output of the summer acts as an actual input signal to the amplifier. The figure shows the block diagram of the oscillator. The difference between positive feedback amplifier and oscillator is that, in oscillator, there is no need of external input signal. To start the oscillations, output signal must be fed back in proper magnitude and phase.
Fig: Blockdiagram of Oscillator
 For Replay click again on 'Click here to Start Animation'
Principle of Oscillators
How Oscillations are initiated at First?
We have stated that oscillators do not require any external input. This means an oscillator's output feeds its own input and it must satisfy the two essential conditions to start oscillations. Here, you might be eager to know, from where the starting voltage comes. All of you are aware that every resistor has certain free electrons. At room temperature these free electrons move randomly and generate a noise voltage across the resistor due to collisions. This voltage is also known as thermal noise voltage. Hence, the resistor acts as small ‘ac’ voltage source. When power supply is turned on, for the first time this small ac noise voltage gets amplified and appears at the output terminal. This amplified output is applied to feedback circuit and output of feedback circuit is fed back to the amplifier as an input. It is again amplified by amplifier and fed back to input through feedback circuit. This process is repeated and at one particular frequency, circuit satisfies the necessary conditions to start oscillation. Using proper feedback components, it is possible to select the particular frequency.
Fig: How Oscillations are initiated
For Replay click again on 'Click here to Start Animation'
Before explaining the block diagram of an oscillator, let us recall the concept of positive feedback amplifier. All of you know that positive feedback amplifier consists of amplifier having gain of ‘A’ and feedback circuit with gain of ‘β’. Here, a part of output is fed back to input through feedback circuit. The signal which is fed back is added to the input signal using summer ‘Σ ’ and output of the summer acts as an actual input signal to the amplifier. The figure shows the block diagram of the oscillator. The difference between positive feedback amplifier and oscillator is that, in oscillator, there is no need of external input signal. To start the oscillations, output signal must be fed back in proper magnitude and phase.
Fig: Blockdiagram of Oscillator
Principle of Oscillators
An oscillator consists of an amplifier and a feedback network. Now, let us see which basic components are required to obtain oscillations.
'Active device' either Transistor or Op Amp is used as an amplifier.
'Feedback circuit' with passive components such as R-C or L-C combinations .
To start the oscillation with the constant amplitude, positive feedback is not the only sufficient condition. Oscillator circuit must satisfy the following two conditions known as Barkhausen conditions:
1. The first condition is that the magnitude of the loop gain (Aβ) must be unity. This means the product of gain of amplifier 'A' and the gain of feedback network 'β' has to be unity.
2. The second condition is that the phase shift around the loop must be 360° or 0°. This means, the phase shift through the amplifier and feedback network has to be 360° or 0°.
How Oscillations are initiated at First?
We have stated that oscillators do not require any external input. This means an oscillator's output feeds its own input and it must satisfy the two essential conditions to start oscillations. Here, you might be eager to know, from where the starting voltage comes. All of you are aware that every resistor has certain free electrons. At room temperature these free electrons move randomly and generate a noise voltage across the resistor due to collisions. This voltage is also known as thermal noise voltage. Hence, the resistor acts as small ‘ac’ voltage source. When power supply is turned on, for the first time this small ac noise voltage gets amplified and appears at the output terminal. This amplified output is applied to feedback circuit and output of feedback circuit is fed back to the amplifier as an input. It is again amplified by amplifier and fed back to input through feedback circuit. This process is repeated and at one particular frequency, circuit satisfies the necessary conditions to start oscillation. Using proper feedback components, it is possible to select the particular frequency.
Fig: How Oscillations are initiated
Operation of MEMS Bistable Switch
MEMS:
Microelectromechanical systems (MEMS) also referred to as micromachines (in Japan), or micro systems technology – MST (in Europe).MEMS are separate and distinct from the hypothetical vision of molecular nanotechnology or molecular electronics. MEMS are made up of components between 1 to 100 micrometres in size (i.e. 0.001 to 0.1 mm), and MEMS devices generally range in size from 20 micrometres (20 millionths of a metre) to a millimetre (i.e. 0.02 to 1.0 mm). They usually consist of a central unit that processes data (the microprocessor) and several components that interact with the outside such as microsensors.Working:
The animation shows the bistable switch moving from the "off"
position to the "on" position. The transition from "on" to "off"
involves an identical set of operations.
The device operates in two dimensions, so it is easily
implemented in MEMS by the MUMPS process. Certain parts of the
structure became POLY1 and certain parts became POLY2, but the operation
is identical to that shown here.
Operation of the Switch:
- The purple platform is independently disengaged from the wheel.
- The dark blue rod is pulled to signal a toggle.
- The red lever structure amplifies the input movement.
- The green arm advances the orange ratchet wheel one position, rotating around the yellow hub.
- The green arm flicks back over the tooth so it can work again.
- The light blue pawl holds the wheel while the green arm resets.
- The purple platform engages again.
- The new resting position of the platform is now different.
Hardwork Can Never Ever Fails...
Best Luck...
Digital Clock-Working Animation
How it works?
Each clock requires an oscillator.For a digital clock, this is generally provided by a crystal. The crystal is made from glass. When an electric charge is sent through the crystal it changes shape very slightly and creates a very slight sound. The sound is at a regular frequency which is converted to an electronic signal. The oscillations of a 60 Hertz oscillator can then be reduced to a 1 Hertz oscillation by a series of counters, the first counts one every ten oscillations and the second counts one every six counts of the 10 counter. The 1 Hertz signal is now perfectly set up to indicate the passing of seconds, because the definition of 1 Hertz is one oscillation per second!
The 1 Hertz oscillation is further reduced by a 10 counter in order to figure the minutes and another 6 counter added after that will give the number of hours. Each counter is then connected to a chip that converts the count on the counter to a signal to a "7-segment" display, to indicate the number counted for that particular counter. A "7-segment display" is a very familiar device that is seen on the face of most digital clocks. It can be an LED (light emitting diode) or an LCD (liquid crystal display).

When a digital clock clicks over from 12:59 to 1:00 it has to be reset to, in effect, start over. Most digital clocks will be equipped with a built in processor looking for the number 13 in the hours column and when this occurs sets the hour counter back to 1. For a user to set the clock to the correct time, buttons are installed that allow increased frequencies to flow through the minute or hour counters, causing them to move faster.
Hardwork Can Never Ever Fails...
Best Luck...
Wednesday, August 01, 2012
How 3 Phase Power Supply works?
 |
| 3 Phase current flow |
In a three-phase system, three circuit conductors carry three alternating currents (of the same frequency) which reach their instantaneous peak values at different times. Taking one conductor as the reference, the other two currents are delayed in time by one-third and two-thirds of one cycle of the electric current. This delay between phases has the effect of giving constant power transfer over each cycle of the current and also makes it possible to produce a rotating magnetic field in an electric motor.
Animated Electronics

A good collection of Electronics animations in Java applet is available in the following Blog.
Please CLICK HERE to visit the Blog.
I think it will be useful for all...
How Yagi-Uda antenna works?
Yagi antenna, also known as a Yagi-Uda array or simply a Yagi, is a unidirectional antenna commonly used in communications when a frequency is above 10 MHz. It is used at some surface installations in satellite communications systems.
A basic Yagi consists of two or three straight elements, each measuring approximately1/2 electrical wavelengths. The antenna can be balanced or unbalanced. The Yagi is inherently a balanced antenna, but it can be fed with coaxial cable and a device called a balunat the point where the feed line joins the driven element.
The driven element of a Yagi is the equivalent of a center-fed, half-wave dipole antenna. Parallel to the driven element, and approximately 0.2 to 0.5 wavelength on either side of it, are straight rods or wires called reflectors and directors. A reflector is placed behind the driven element and is slightly longer than 1/2 wavelength; a director is placed in front of the driven element and is slightly shorter than 1/2 wavelength. A typical Yagi has one reflector and one or more directors. The antenna propagates electromagnetic field energy in the direction running from the driven element toward the director(s), and is most sensitive to incoming electromagnetic field energy in this same direction.

The Yagi antenna not only has a unidirectional radiation and response pattern, but it concentrates the radiation and response. The more directors a Yagi has, the greater the so-called forward gain. As more directors are added to a Yagi, it becomes longer. Some Yagi antennas have as many as 10 or even 12 directors in addition to the driven element and one reflector. Long Yagis are rarely used below 50 MHz, because at these frequencies the structure becomes physically unwieldy.
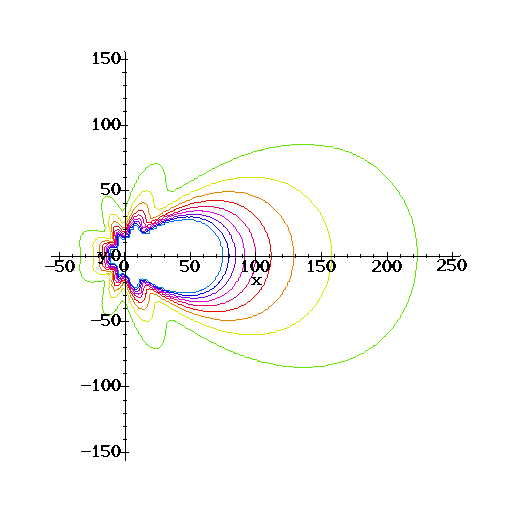 |
| Radiation pattern of Yagi-Uda antenna |
 |
| Animation of radiation pattern of Yagi-Uda antenna |
Tuesday, July 31, 2012
Parabolic antenna
 |
| Parabolic Antenna |
A parabolic antenna is an antenna that uses a parabolic reflector, a curved surface with the cross-sectional shape of a parabola, to direct the radio waves. The most common form is shaped like a dish and is popularly called a dish antenna or parabolic dish. The main advantage of a parabolic antenna is that it is highly directive; it functions similarly to a searchlight or flashlight reflector to direct the radio waves in a narrow beam, or receive radio waves from one particular direction only. Parabolic antennas have some of the highest gains, that is they can produce the narrowest beam width angles, of any antenna type.Parabolic antennas are used as high-gain antennas for point-to-point communication, in applications such as microwave relay links that carry telephone and television signals between nearby cities, wireless WAN/LAN links for data communications, satellite and spacecraft communication antennas, and radio telescopes. Their other large use is in radar antennas, which need to emit a narrow beam of radio waves to locate objects like ships and airplanes.
 |
| Parabolic antenna at transmitter section |
At the transmitter section the operating principle of a parabolic antenna is that a point source of radio waves at the focal point in front of a paraboloidal reflector of conductive material will be reflected into a collimated plane wave beam along the axis of the reflector.
 |
| Parabolic antenna at receiver section |
At the receiver section an incoming plane wave parallel to the axis will be focused to a point at the focal point.
Subscribe to:
Posts (Atom)